The images saved by ScepterGUITool are located in the “SaveImage” folder in the root directory. Users can choose the images they want to view based on their needs. The saved images include:
1. Depth map: Stored in 16-bit single-channel PNG format, with values in millimeters.
2. RGB map: Stored in 8-bit three-channel color image in JPG format.
3. IR map: Stored in single-channel PNG format.
4. Point cloud maps: Data is saved in .txt format, with each row representing the 3D coordinates of a point.
Table of Contents
Depth/ RGB/ IR maps
ScepterGUITool saves depth/ RGB/ IR maps
In the ScepterGUITool, select the “2D” interface, and choose the corresponding image type (Depth/Color/IR, etc.), as shown in the image below.

On the left side of the toolbar in the SaveImage section, you can choose two storage methods for depth/ RGB/ IR images:
Method 1: Save multiple frames maps
Users can set the number of frames they want to save and click the “Record” enable switch to obtain the corresponding number of images. As shown in the image below:

Save location: The save location is in the same directory as ScepterGUITool.exe, under \SaveImage\record, as shown in the image below.

Method 2: Save a single frame map
Click the camera icon “📷” next to Snapshot. As shown in the image below:

Save location: A save successful window will pop up, you can click “OpenUrl” to open the save path, as shown in the image below:

Viewing depth/ RGB/ IR maps
Depth/ IR/ RGB maps saved by ScepterGUITool can be viewed using ImageJ.
Download ImageJ from: https://fiji.sc/.
After installation, double-click the application to display the window, as shown in the image below:

To view the images (Depth/IR/RGB maps) using the ImageJ program, open the images with ImageJ. You can view the image information using the toolbar as shown in the image below:

Area selection Tool: Users can select different shapes in the image as needed.
Line selection tool: Users can choose line types to draw and view line information in the status bar.
Angle Tool: Users can draw two intersecting lines and measure the angle formed.
Point tool: Allows users to click and view the coordinates (x, y) and value of marked points (where the value for depth/IR images is brightness and for RGB images is the three-channel color value).
Wand tool: This tool can automatically find object edges and trace shapes.
Text Tool: Users can input information (numbers and letters) in a text box and move the box to the desired location.
Magnifying glass tool: Users can left-click to zoom in on the image and right-click to zoom out.
Scroll tool: When the current image is larger than the window, this tool can be used to drag the image for viewing.
Color pocker tool: This tool uses an eyedropper to pick colors from the image, allowing users to set the foreground/text color.
Additional tools: There are many more tools available, and users can refer to “ImageJ User Guide” for more information and usage.
Point cloud map
Saving point cloud map with ScepterGUITool
In the ScepterGUITool, select the “3D” interface and choose the corresponding type you want to save, as shown in the image below:
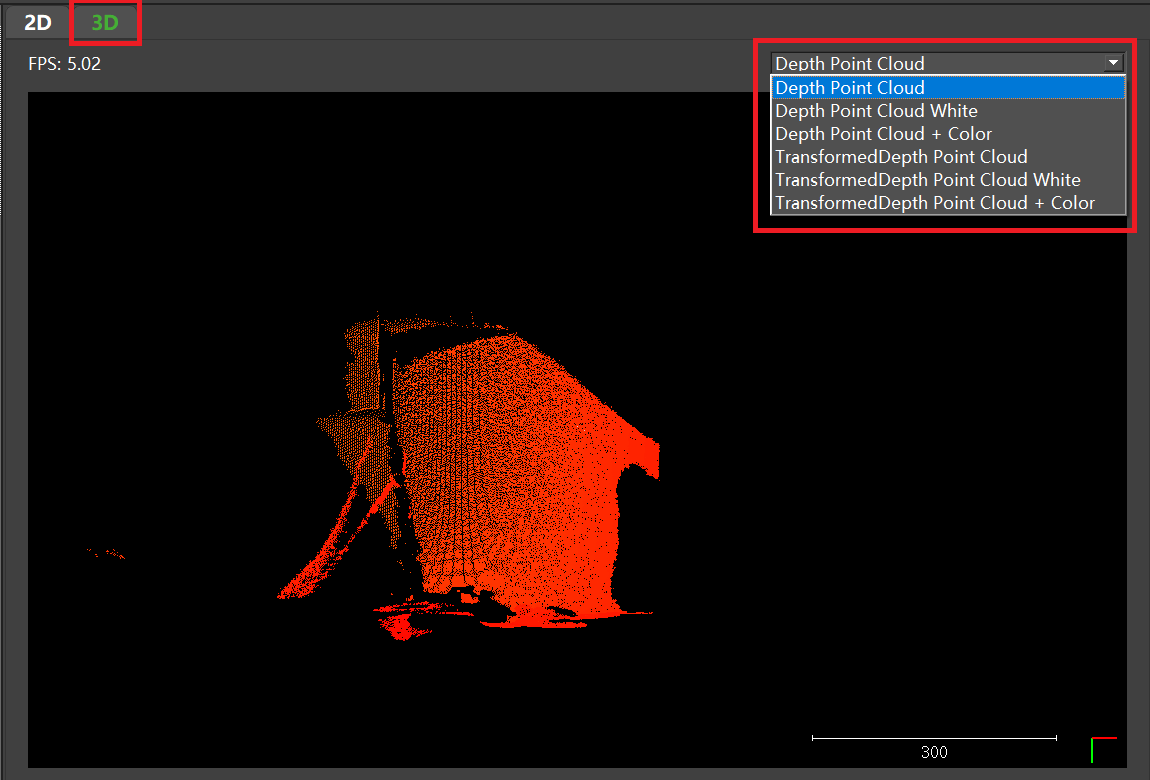
The point cloud map saves the 3D coordinates of each point. Due to the large amount of data and resource consumption, currently, only single-frame point cloud images are allowed to be saved. On the left side of the toolbar in the saveImage section, click the camera icon “📷” next to snapshot. A “Save” window will pop up, as shown in the image below.:


Viewing point cloud map
Point cloud data is saved in “.txt” format, with each row representing the 3D coordinates of a point. These can be viewed using CloudCompare.
Download CloudCompare from: https://www.cloudcompare.org/.
After installation, double-click the application to display the window, as shown in the image below:
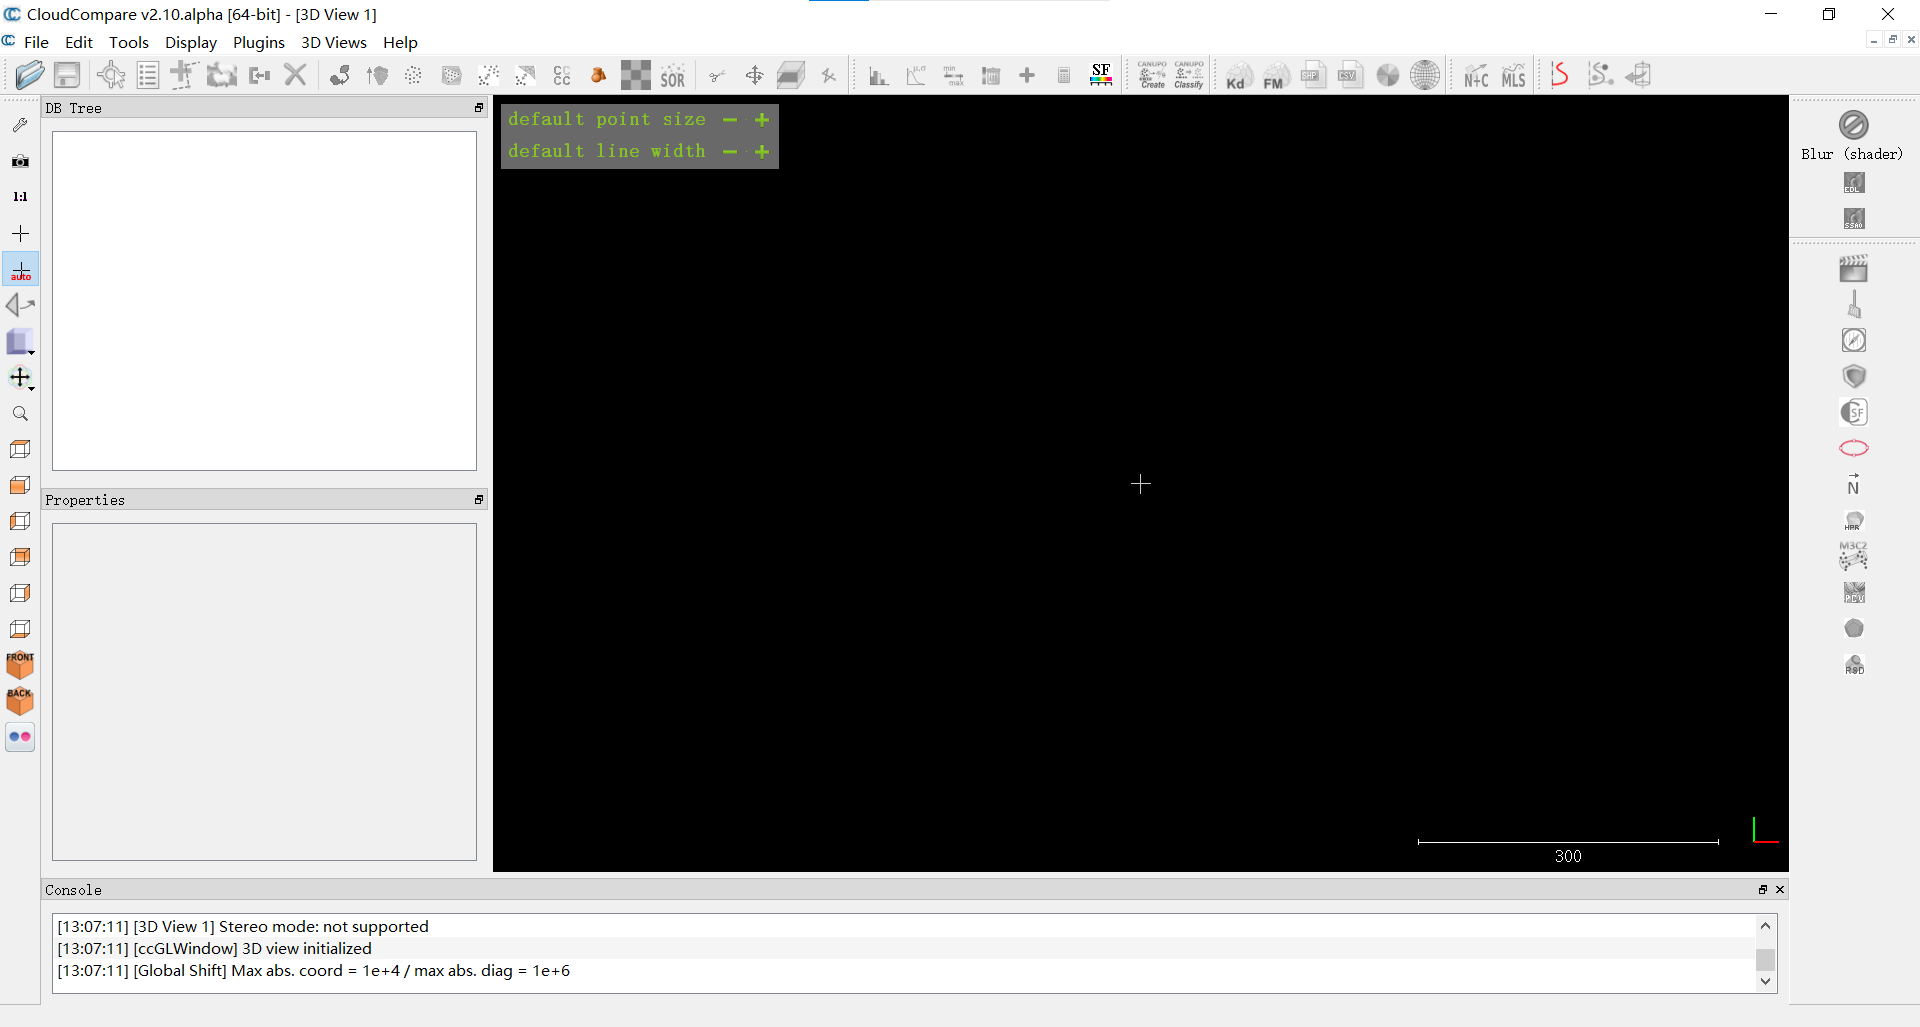
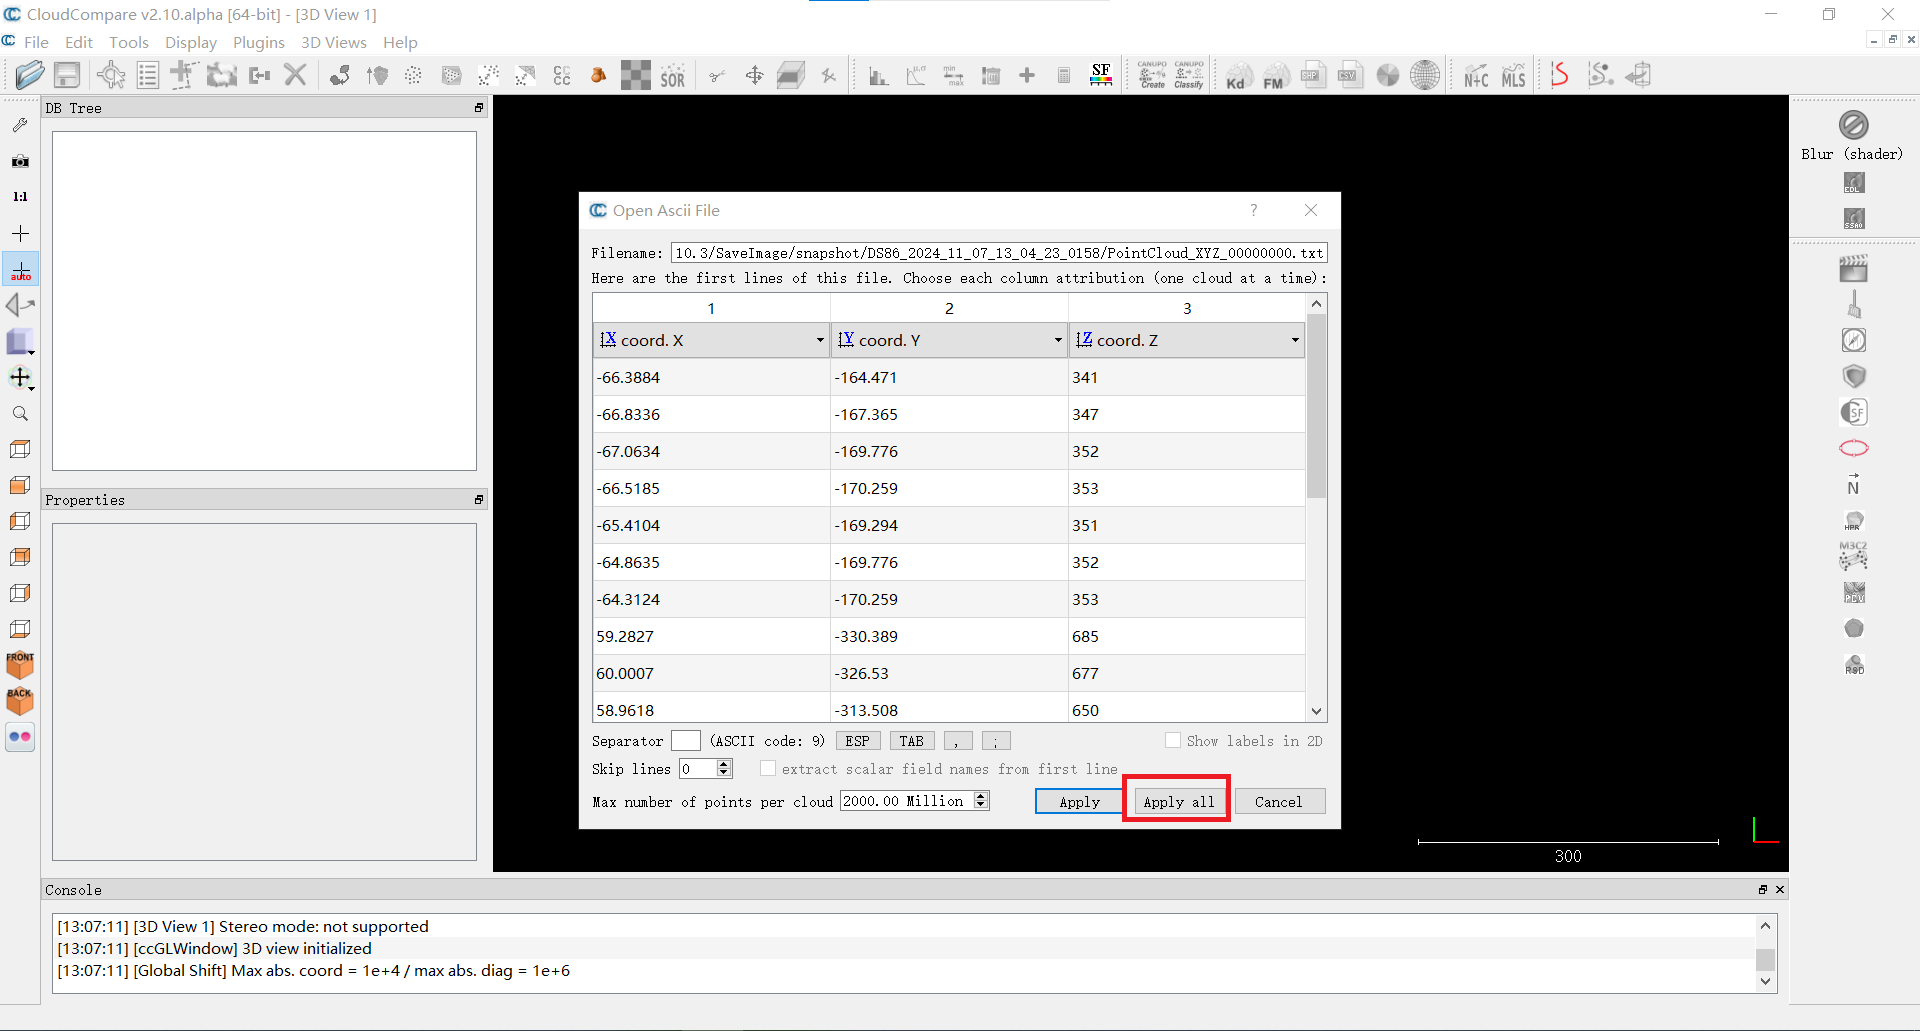
Drag the .txt file generated by ScepterGUITool into CloudCompare, select “Apply all” and open the point cloud map. As shown in the image below:
The tool distribution diagram is shown in the image below:
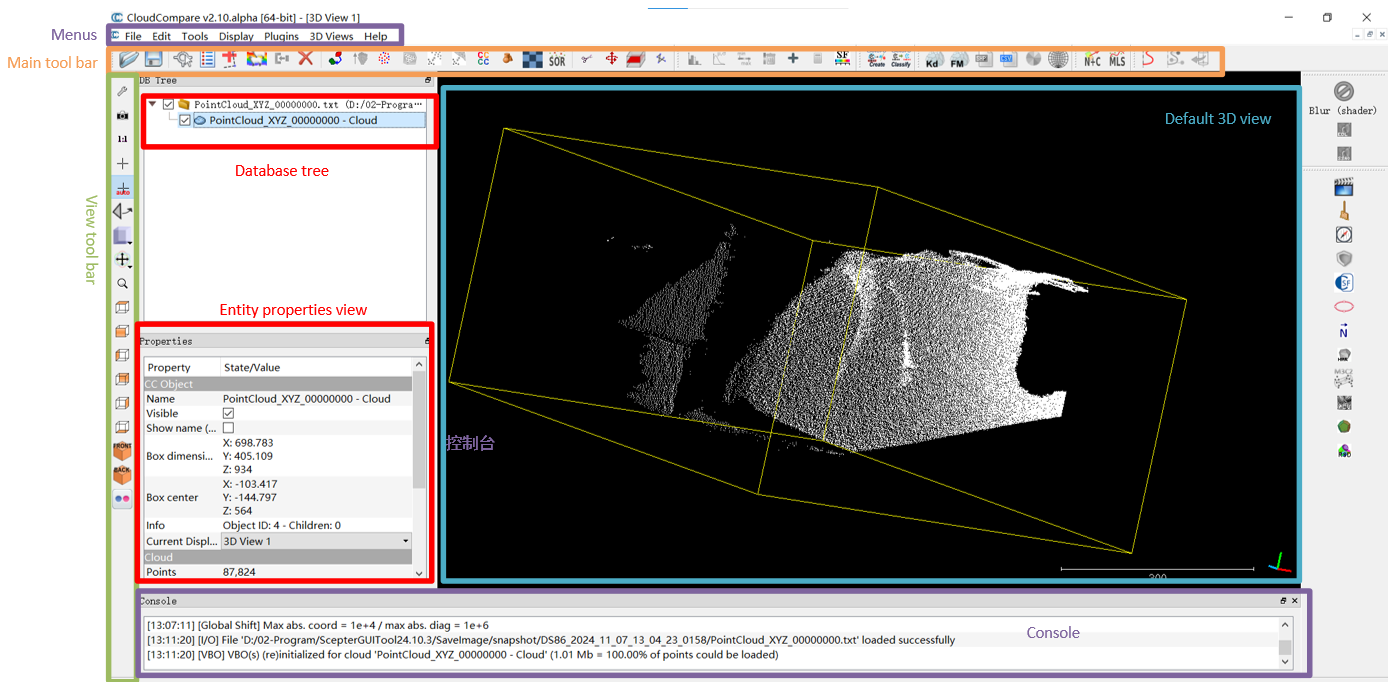
The menu bar includes functions such as File, Edit, Tools, Display, Plugins, and 3D View. Among them:
File: Operations such as open, save, exit, etc.
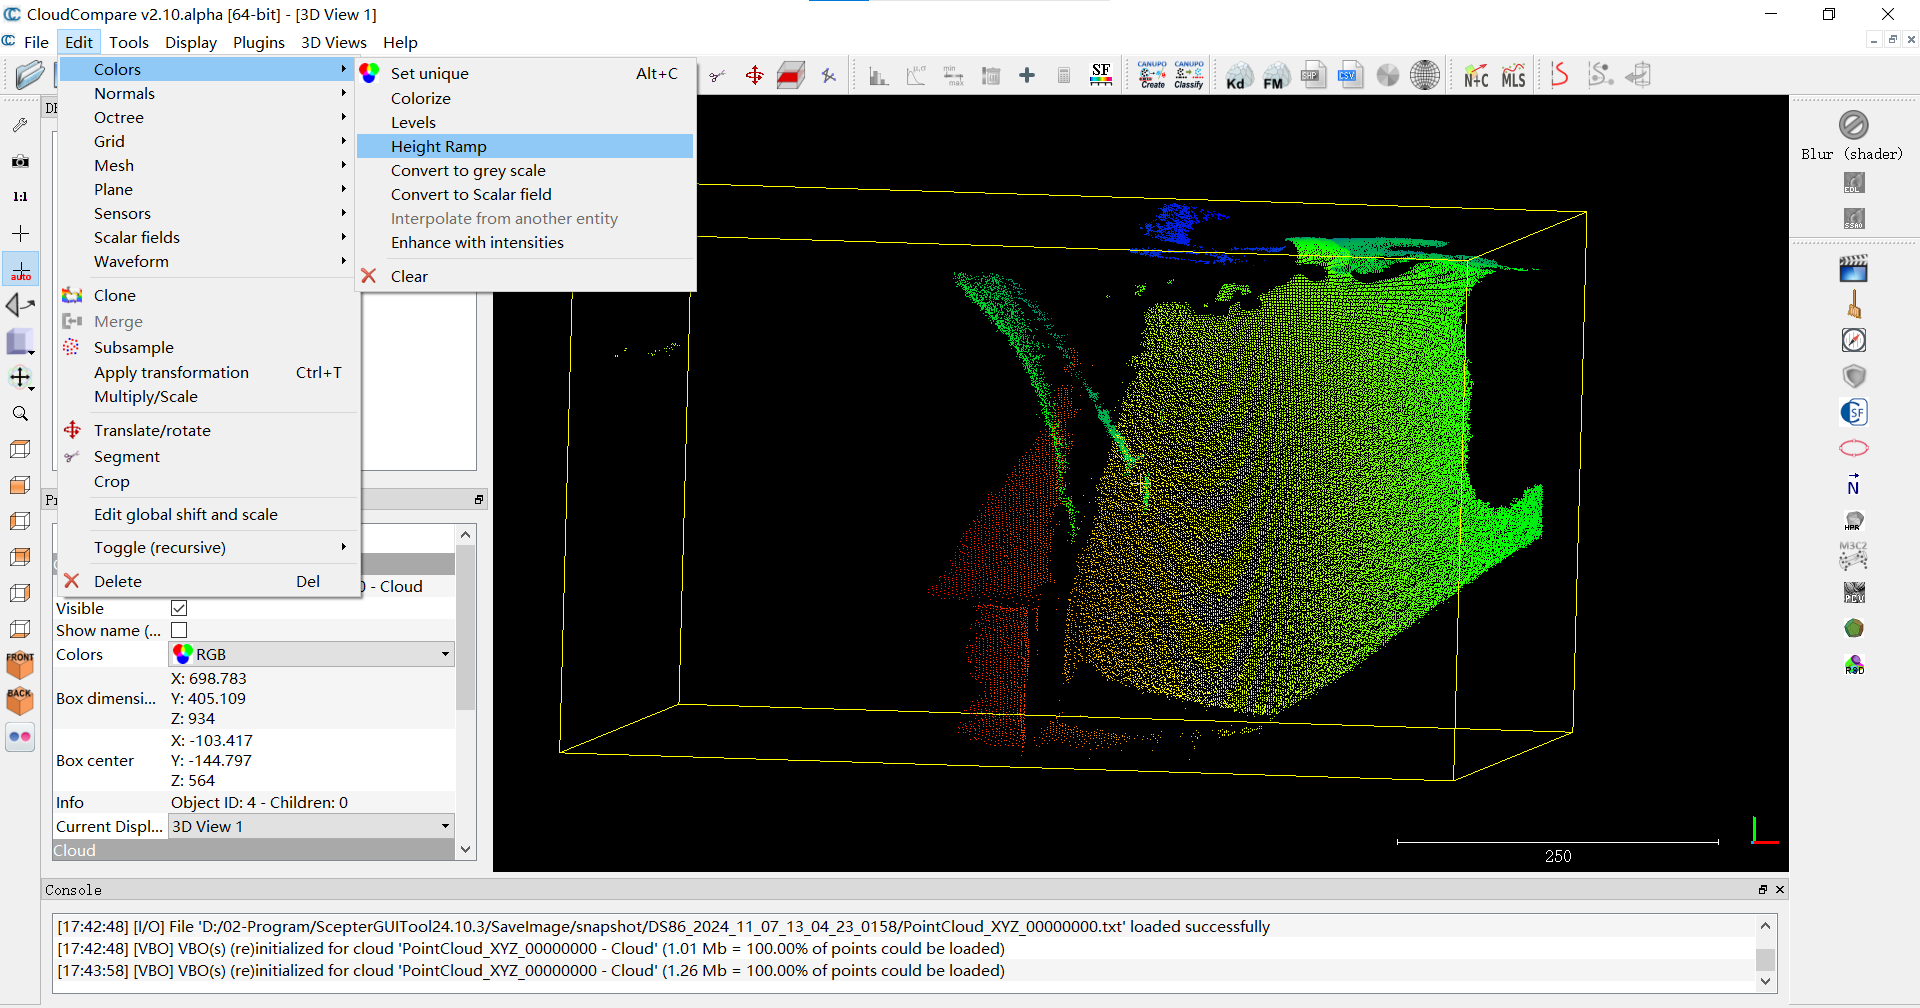
Edit: Allows editing entity features, color normals, scalar fields, etc. For example, setting a height ramp to make spatial contrast more apparent, as shown in the image below:
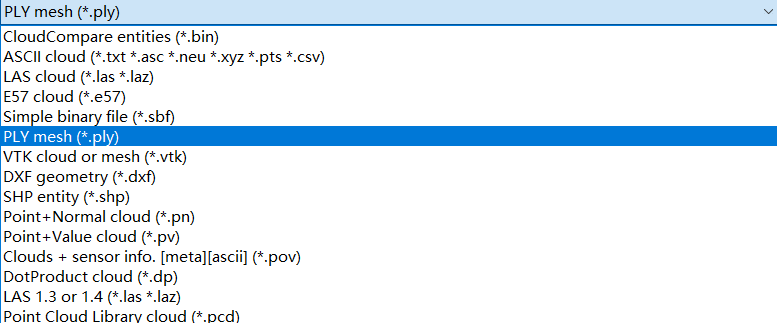
File save formats: Users can convert the .txt point cloud format generated by the ScepterGUITool to different formats using the CloudCompare tool. The supported formats are as shown in the image below:
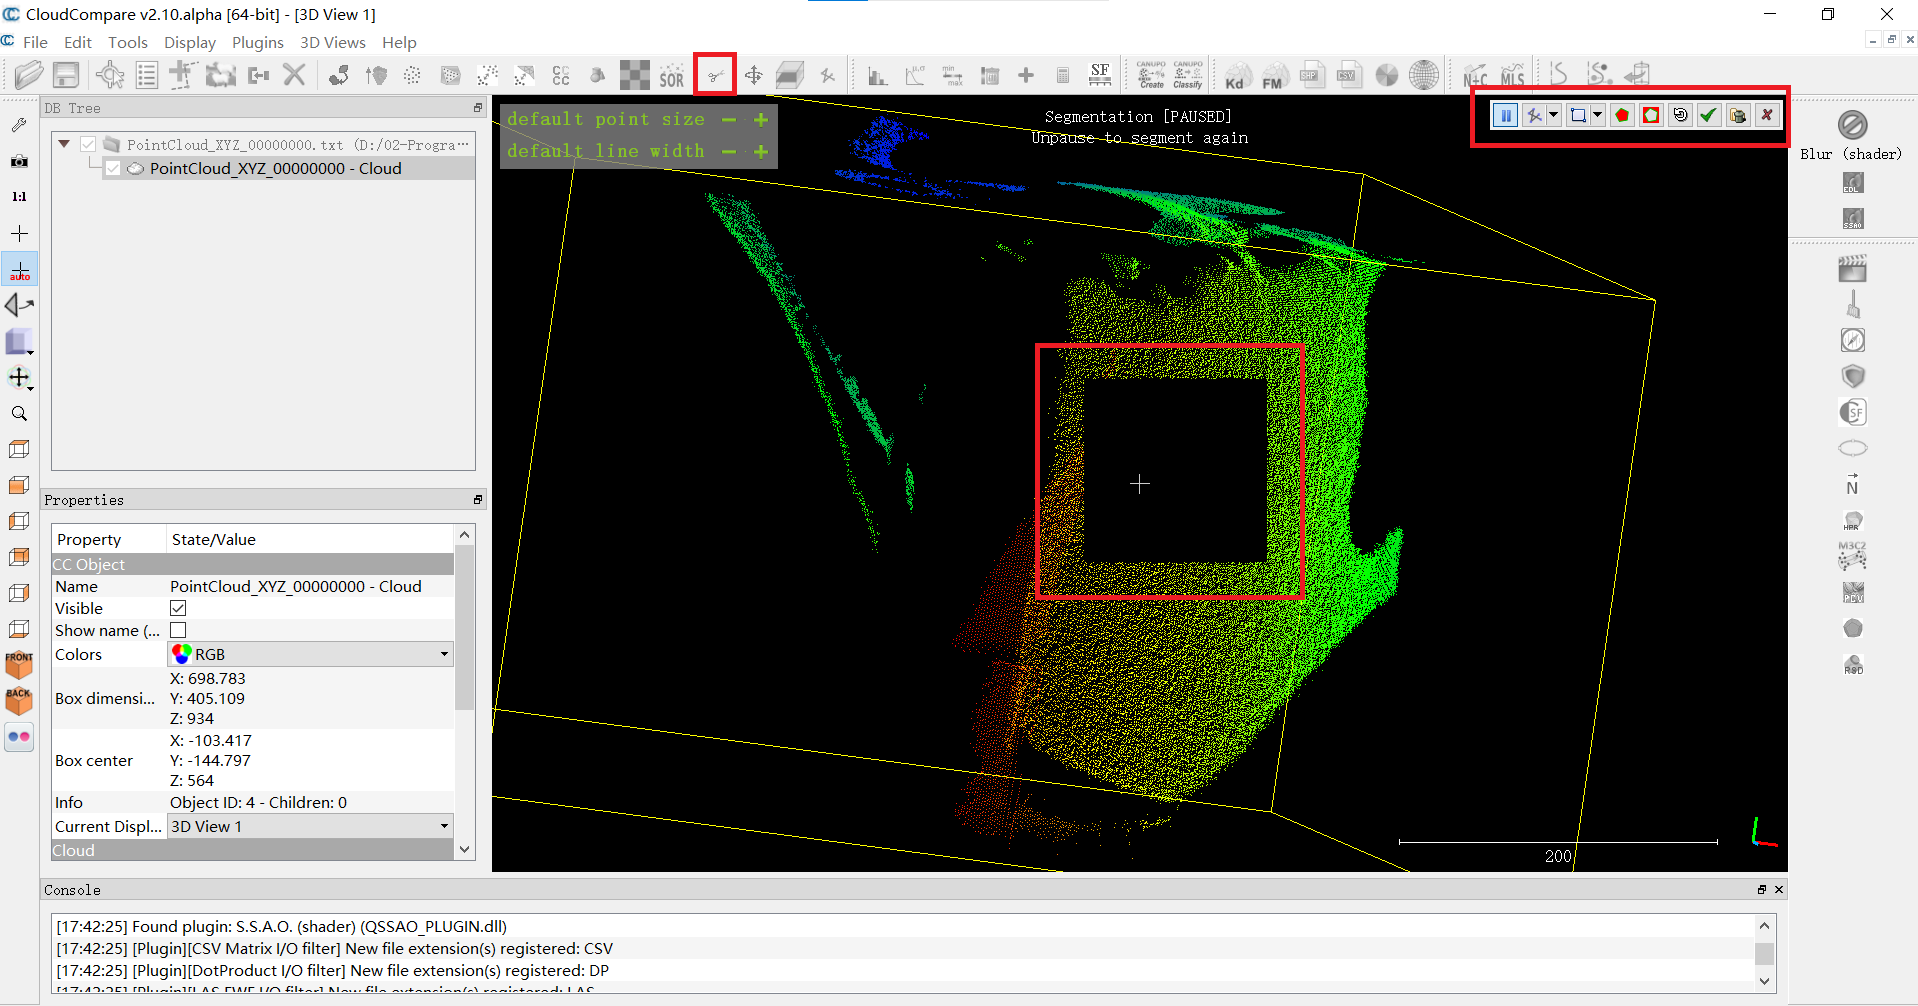
Main toolbar: Quick access to major editing and processing tools include open/save, point picking, cropping, etc. For example, if the user wants to save maps of certain points, they can crop the image as shown below:
View toolbar: Quick access to display-related tools.
Database tree: Users need to select an entity before performing subsequent editing operations, as shown in the image below:
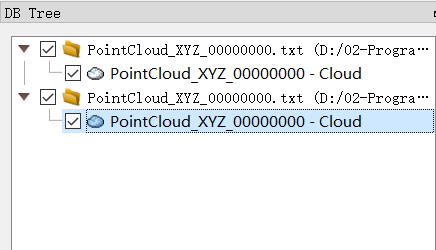
Entity properity view: This view contains all the image information of the currently edited entity. Users can set it according to their needs.
3D view: Users can use the mouse to drag, rotate, and perform other operations to view the image.
The point cloud viewer CloudCompare has many more tools available. Users can refer to the “CloudCompare – Open Source project“document for more information and usage.


